• Meet Me
  • Sponsor
  • Testimony
  • Print Shoppe
  • Recipes

Forever Beloved

Faith, Love & Truth

July 17, 2022

Being Still and Quiet

I have taken quite a long hiatus from writing here.  It wasn’t intentional, at least not on my end.  In January of 2021 I heard God telling me to be still and be quiet.  When I first heard that, my first response was I heard Him wrong.  I mean, doesn’t He realize who I am?  I’ve never been quiet a day in my entire life.

I wish I could say I listened to Him straight away.  But this girl has never been one to catch on quickly.

Eventually, I gave in and headed His prompts.  I was still and quiet.  I knew if He was telling me this, there was a good reason for it.

A month later my Dad got sick.  The next month I had my third brain surgery.  I got meningitis.  My sweet, sweet Dad passed away.  And I had another abdominal surgery.

God was preparing my heart for the hardest season of my life.  I needed those quiet, still moments.  I craved them.  And in those moments, I found myself continually throwing myself at my Father’s feet.

I felt today, finally, God telling me it’s time.  It’s time to get back on here and share.

I have anticipated this day for months.  I worried about how I would make my entrance back.  I worried if I would still be able to write.  I stressed about what words I would say.  I was so anxious about this post.  But, now that I’m here, the words are flowing.  That’s all Him y’all, not me.

While I was writing this a song came on that made me sit up and listen.  Again, a God moment without a doubt.

There’ve been times I felt so all alone
But in my lonely hours
Yes those precious lonely hours
Jesus let me know I was his own
Through it all
Oh I’ve learned to trust in Jesus
I’ve learned to trust in God

I have always felt as if my biggest testimony comes in my medical journey.  I think that is where He wants me to begin.

In the fall of 2011 I went in for a routine laparoscopic hysterectomy.  One of the first cuts the doctor made hit a main artery.  A 9 inch incision, 2 units of blood, 1 unit of plasma and 1 unit of platelets later I woke in ICU.  I had nearly died during the surgery.  And during the surgery the doctor also missed a huge cyst on my left ovary.  Four months later I went in to have that removed.

During that surgery, the same doctor put a clip on my ureter and put a hole in it.  Three days later I had emergency surgery for a kidney that hadn’t drained in days.  They installed a stent, hoping that would help the ureter heal.

Over the next 7 months, I had 8 surgeries to replace the stent.  Each one would get corroded and calcified and cause a kidney infection, which would knock me down.  Finally the doctors at the Cleveland Clinic determined I needed a ureter reconstruction.

In October of 2012 I had a 14 hour surgery to repair my damaged ureter.  While they were operating, they also found I had a partial bowel obstruction from adhesions and that was fixed as well.

The surgery was a success!  But sadly, my kidney had too much damage done to it.  It was no longer functioning at all and was causing more harm than good.  In February of 2013 I had my kidney removed.  It was a routine surgery but unfortunately I had a small stroke during it, awaking to a completely numb face on the left side.

Because of all the prior abdominal surgeries, adhesions were growing rampant in my abdomen.  And we found out I have Adhesion Related Disorder.  I’ve had five robotic lysis of adhesions, and it’s a surgery I will need for the remainder of my life every year or so.  I’m having another one next month.

I found out in March of 2018 that I was born with Ehlers-Danlos Syndrome, a diagnosis that explains so much of my medical journey thus far.  The EDS has caused Intracranial Hypertension (my body produces too much cerebrospinal fluid (CSF) and the pressure within my skull is too high).  The Intracranial Hypertension had also caused stenosis of a vein in my brain, a partially empty sella, hearing loss, the loss of eye sight, memory issues and horrible daily headaches.  And the stenosis of my right transverse sinus also increased my stroke risk (and explains the stroke I had during the 2013 surgery).

In June of 2018 I had a stent placed in my right transverse sinus, hopeful that it would reduce the pressure inside my skull but knowing it was up to my brain to see it as a solution.  It didn’t.  And in October of 2018 I had a Ventriculoperitoneal (VP) Shunt placed in my brain.

But because of having EDS, my body doesn’t heal quite right.  And the incision in my abdomen from my shunt surgery didn’t heal correctly, and it created an incisional hernia.  Not only that, but the hernia also pulled my shunt tubing up out of the right side of my abdomen and had it laying on my liver.  I had surgery to correct the incisional hernia and a shunt revision.

In the winter of 2021 I realized many of my high pressure symptoms had returned.  Through some testing and a visit with my neurologist it was determined I needed a new VP Shunt placed.

A week or so later, my Dad got sick and entered the hospital.

I had surgery in March of 2021 to replace my VP Shunt.  The surgery went well, praise Jesus!  But a week later I began to feel extremely sick.  It seemed to get worse each day.  It took me weeks to convince an ER doctor to do a bedside spinal tap.  As I was afraid of, I had meningitis.  I was transferred back to the hospital where my shunt surgery had been.  I had three days of some heavy IV antibiotics and was released.  Before being released, a CT scan was done.  And they saw all of my abdominal shunt tubing was out of my abdominal cavity and sitting below my skin.  Surgery to fix that was scheduled for a month later.

This was the same time my Dad entered a nursing home.  At least now we would be able to go visit with him.  Because of the hospitals Covid protocol, only my Mom could visit him there.  My kids, my husband and I got to spend some precious time with him.  Time we will always treasure!

My Dad was placed on hospice care the Friday before my scheduled abdominal surgery.  He went home with Jesus two days later.  I somehow was able to call on a Sunday, get the right person at the hospital, cancel my surgery for the following day, and get it rescheduled for the following week.  Another God moment!

To say those months were hard, and scary, and taxing is putting it mildly.

But, God.

And as I’ve said numerous times, God has me on this journey for a reason that is precious and perfect. And while I may not know His reason, I will praise Him in the midst.

Throughout this entire journey I’ve been reminded time and time again of God’s extravagant love for me.  In the darkest places, I found Him there with me.  Speaking to my heart.  Speaking life into the hurt places.  I’ve learned what it’s like to seek and find Him. I’ve thrown myself at His feet in a teary heap, time after time.  Sometimes moment by moment.  I’ve learned that even in the hard times, He gives us enormous blessings.  I’ve learned joy doesn’t come and go with our circumstances.  But joy can be experienced despite our circumstances.  Joy is a fruit of the Spirit, second only to love, it flows from God, not circumstances.  We have a fundamental need for joy in our lives.  Life without joy is overwhelming, depressing and just plain sad.

God loves all of us extravagantly.  And He’s not finished with a single one of us.  The fact is, He has a sovereign plan that is for good and not evil.  For joy and not sorrow.  He is writing a story of on-going redemption with each of our lives.  Our lives are woven together through seasons.  It’s one person’s season to experience this.  And another person’s season to experience that.  Neither is loved more.  Neither is more dispensable.

Ecclesiastes 3:11 sums up what I’ve felt in my heart in a few simple, powerful words: He hath made every thing beautiful in his time.

His time. His time. His time. HIS TIME.

Joy comes in knowing Jesus, experiencing His presence and trusting His timing.  Joy comes when we fall more in love with the One who loves us most.  To experience joy is to experience Jesus.

So many times we want joy, but not trails.  We want faith, but not testing.

Y’all, I’m going to be honest, I’ve thought many times how much easier my life would be without pain, without surgeries, without loneliness, without heartbreak and without financial hardships.  As crazy as it sounds, I wouldn’t change a thing.

God often uses the hard to refine us.  To transform us into the person we were created to be in the first place.  More like Him.

If you are going through a hard season of trials, I encourage you to find joy in the midst of the hard.  While it isn’t always easy, it is always worth it!

Filed in: Uncategorized • by Amy • 3 Comments

[jetpack-related-posts]

January 26, 2021

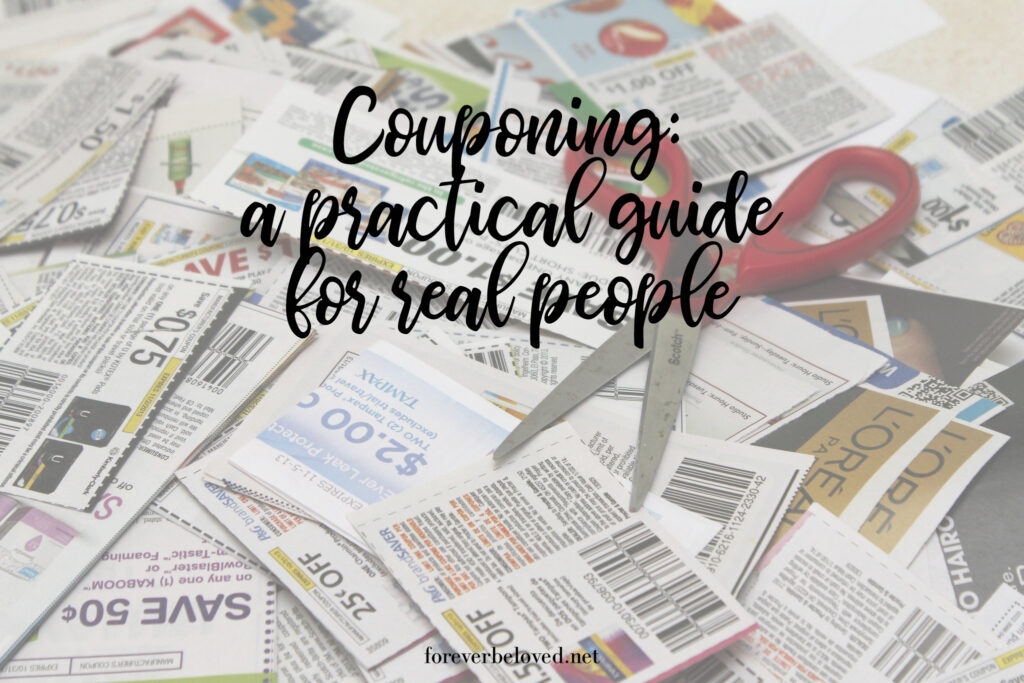
Couponing | A Practical Guide For Real People

Have you ever overheard someone saying how much money they’ve saved couponing and think how in the world did they do that?  Today I’m going to share my couponing tips and tricks with you.

Do you remember that show Extreme Couponing on TLC?  Yeah, that’s not really what we’re going to go over.  For real people, that’s just unrealistic.  None of us have hours every day to dedicate to couponing.  But 2-3 hours per month, that’s something I can handle.  My goal is to help you save as much as you can on your weekly grocery bill.

During my last grocery trip I saved $117.  But I have saved as much as nearly $200 on a previous shopping trip.  And you can do that too, I promise!  Let’s get into it, I know you’re anxious to get started.

What You Need

Before we begin there are a few things you’ll need.

  • A printer – to print online coupons
  • A laptop or computer – to find online coupons
  • A plastic binder with dividers – to organize your coupons
  • Store flyers
  • Sunday paper (or any paper that includes coupons)

Set Aside Time

One thing I will tell you upfront, couponing takes time.  I would suggest setting aside an hour or two, possibly longer, to prepare your grocery list and get your coupons prepared for your trip.  If you try to do this in the store while you’re shopping you’d most likely get overwhelmed and frustrated.  Not to mention you’d miss out on all the great coupons you can snag online.

Where To Find Coupons

There are a few different places you can find coupons.  I suggest utilizing all of them.

  • Store coupon walls/bulletin boards
  • Local newspapers
  • Store flyers
  • Coupon websites
  • Coupon apps
  • Store’s website

Know The Policies

Different grocery stores have different coupon policies.  To save the most money, you need to find a store that aligns with the type of coupons you want to use.  Here are a few things to find out beforehand.  You can also call the store and ask them what their coupon policies are if you can’t find them listen online anywhere.

  • Do they accept internet printed coupons
  • Do they double or triple coupons (Weis doubles up to 99 cents)
  • What amount do they double to
  • Do they allow you to combine coupons
  • Do they also offer e-coupons
  • Do they have a reward program

Get The Sale Flyer

This is where I begin my grocery list.  I get the sale flyer and mark what I need that is already on sale.  This is also where you’ll save the most money, combining a coupon with an item already on sale.

Online Shopping

We’re going to talk about online shopping in general here, not necessarily grocery shopping.  If you are shopping online, consider using a cashback app like Rakuten or Swagbucks.

This year I did most of my Christmas shopping online.  And I used Rakuten to shop through.  Over the past two years I’ve received $194.98 in cash back by shopping through there.  It’s so easy, and at the end of the quarter they just send you a check with your cashback on it.

Organize Your Coupons

Once you’ve clipped the coupons you need, organize them in whatever way works for you.  Some people use a binder, some people use an envelope system.  As long as the system works for you it doesn’t matter what it looks like.  Keeping it simple will help you actually use the coupons you collect.

I use an envelope system.  I mark the envelopes with what is inside (dairy, canned goods, beauty, etc.) and just throw a rubber band around all the envelopes to keep them together.  It’s not a pretty system, but it works for me.

Forget Brand Loyalty

Mayonnaise is mayonnaise is mayonnaise.  I would say that about ketchup but my husband strongly disagrees.  If you want to get the most savings you can then throw whatever is on sale in that cart.

Yes, I acknowledge that there are exceptions to this rule.  For instance, ketchup for my husband.  Just watch for sales or coupons on those brands you can’t skimp on and buy them then.

Prepare Your List

I begin by searching the weekly sale flyer.  I find items I need and begin my list.

Once I know what items I want, I start matching coupons.  I go through my envelopes of coupons to see if I have any matches.  If not, I search the internet for specific coupons, such as “Oscar Mayer coupons”.  A lot of times you will find companies actually do offer coupons on their websites.  I then print what ones I find online.

I search coupon sites, such as coupons.com, for coupons I would need. Since these coupons change weekly, I print any ones I would use now or in the future.

I go to the stores website to see if they have any ecoupons I can use that week.  I click on “clip coupon” and it loads those coupons to my store reward card.  When I swipe my card at checkout it automatically applies those coupons to my order.

Make sure to read the fine print on the actual coupon.  Coupon values are determined by their wording, not by the item pictured.  Look for words like “any variety” and limiting terms like “applies to 1.4 ounces size and larger.”

I create a very detailed grocery list, normally in Excel, that includes how many items I need to buy and what the coupon details are (for example, buy one get one free).  That helps me keep things straight while I’m in the store.

I try my hardest to only buy items that are on sale.  On top of that I then try to only buy it if I have a coupon for it.  Of course there are times you need to pay full price, I realize that.

How To Successfully Use Coupons

Here are a few examples on great ways to use those coupons!

Combine a manufacturer coupon and a store coupon together. Example: Stove Top has a manufacturer coupon for stuffing. Your local grocery also has its own coupon for Stove Top stuffing. Combine & voìla! Double the savings.

Use a coupon on an item that has been reduced/on clearance. Example: You have a Stove Top manufacturer’s coupon for stuffing, and then find a box that’s reduced by 50% for quick-sale, now only $1. Apply your $3 coupon to the reduced $1 stuffing and presto – you’ve got $2 in overage that the store owes you!  Here is another example: Campbells tomato and chicken noodle soup is on sale for 4/$2 (or .50 a can).  I have two coupons for .50 off two cans (which my store will double).  I would end up getting 4 cans of tomato soup for free.

Applying “catalina” coupons on your bill. Example: Big chains like Walmart and Weis may offer “save _ dollars off your next purchase” – these are also known as “catalina” coupons. Let’s say you only owe $3 on your current bill. Apply a “$5 off” Catalina and you’ve now got a $2 overage.  Nice!  Just make sure to check them for expiration dates.

Matching store mega sale. Example: this week if you purchased $20 worth of Annie’s Pasta, Hamburger Helper, Bisquick, Suddenly Salad and Betty Crocker Cookie Mixes you would automatically save $5 off a meat purchase.  I had coupons for Annie’s Pasta, Suddenly Salad and Betty Crocker Cookie Mix.  I saved $4 with coupons, making the total $16 and then saved $5 off my meat purchase.

Price-matching an item that you’re already using a coupon on. Example: Walmart is selling Oral B toothbrushes for 99 cents. You price-match at a neighboring store and apply a coupon offer of “buy 3 toothbrushes, get $4 off”. Since they’re only 99 cents each, if you buy 3 then you’ve got an overage of $1. Yes!

BOGO (buy one get one free): you can use a coupon for both items, even though one is essentially free.  A lot of people aren’t aware of this.  Even though one item is free, they are scanning both items thus allowing you to use a coupon on both.  This is a great way to get items for next to nothing!

Common Coupon Issues

Some stores will not pay overage in cash. Instead, you may receive credit for future purchases.  Which isn’t a big deal if it’s a store you always shop at.

Stores may not allow you to use two coupons simultaneously, such as a manufacturer’s coupon and a store coupon.  This is why it’s best to familiarize yourself with that particular stores coupon policies in advance.

Tips

Don’t buy an item just because you have a coupon, only buy items you need.  Money spent on things you don’t use is money wasted, not money saved.

See a free coupon magazine?  Don’t just grab one, grab several!  Even if coupons are limited to one per transaction, you can use them again on another trip!

Make sure you are getting the Sunday paper, that’s normally where you’ll find lots of great coupons.

If you have a high value coupon, hold out until that item is further discounted for maximum savings.  Just mind the expiration date.

If you can find sites to sign up for free samples, do it.  Most of the samples will come with coupons, some of them being high value coupons (or even for a FREE item sometimes).

Now Go Shop

You’ve got your grocery list, gone through and pulled matching coupons, checked online for additional coupons, and now….go shopping!

Saving money with coupons doesn’t have to be complicated!

Filed in: homesteading • by Amy • 4 Comments

[jetpack-related-posts]

January 15, 2021

Party Slices | Using Pampered Chef Bread Tube

Years ago a coworker brought these for a potluck.  After the first bite, I wondered where they had been my entire life.  They were creamy, savory and the cucumber on top adds just the right amount of freshness.

I don’t know where the name party slices came from, I’m certain it’s not the official name.  But I like to imagine it’s because every party needs this little slice of heaven.

They are fancy little savory cucumber bites.  They include mayonnaise, cream cheese and Pillsbury dough.  Basically the appetizer trifecta!

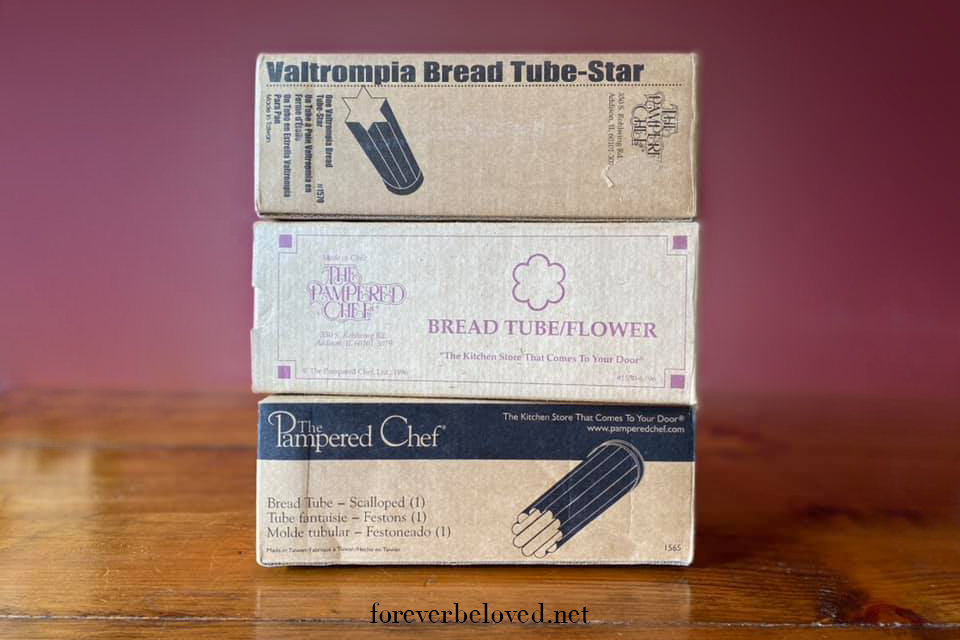
What adds to the fancy is the different shapes you can make the bread in thanks to the Pampered Chef bread tube shapes.  They came in heart, scalloped, square, star and flower shapes.  And while Pampered Chef has discontinued them, you can almost always spot one at your local thrift store.  If you come up emptyhanded there, a quick little Google search can find you one on Ebay or Amazon.  I found a few online here and here.  I was fortunate enough to snag mine before they were discontinued.  The sliced bread just creates the perfect vessel for appetizer-style open face sandwiches.

These area always requested for every gettogether we have, cookout we attend and even my daughter-in-laws bridal shower.  They are always a hit and are so easy to make!

Party Slices

Savory open-faced sandwiches topped with a creamy italian base and cucumber slices.

  • 1 tube Pillsbury French Bread
  • 8 oz cream cheese (softened)
  • 1/2 cup mayonnaise
  • 1 packet Italian salad dressing mix
  • 1 cucumber (sliced thin)
  1. Preheat your oven to 350°.

  2. Spray the inside of your bread tube with nonstick cooking spray. Make sure to also spray the inside of the endcaps. Place one end on the bread tube, stand it upright and place the french bread dough inside. Place the other end on the top of the bread tube. Stand the bread tube up on a cookie sheet (to prevent any oil from seeping down into your oven) and place on the middle rack in your oven. You'll probably need to move your rack a little lower to give the tube room to stand up. Cook for one hour.

  3. When the bread is done cooking, remove it from the oven. Remove the ends from the tube and shake the loaf out.   Let it cool on a wire rack. Once it is cool, slice it into around 1/2" thick slices. Set aside.

  4. In a medium bowl place the cream cheese, mayonnaise and italian salad dressing mix. Mix until well combined. Because I'm a fan of fancy, I put this into a piping bag fitted with a star tip.

  5. Lay the bread slices out and pipe (or spread) the mixture on. Top each piece with a cucumber slice. You could also sprinkle some dill on top. I'm not a fan of dill, so I skip that.

  6. Serve!

Filed in: recipes • by Amy • 6,006 Comments

[jetpack-related-posts]
  • « Previous Page
  • 1
  • 2
  • 3
  • 4
  • 5
  • …
  • 897
  • Next Page »

Search

Categories

Blog Archive

Copyright © 2026 · Theme by Blog Pixie