• Meet Me
  • Sponsor
  • Testimony
  • Print Shoppe
  • Recipes

Forever Beloved

Faith, Love & Truth

May 19, 2017

A Proverbs 31 Bible Study {Week 7}

She makes coverings for her bed;
she is clothed in fine linen and purple.
Proverbs 31:22

So many of these verses we’ve studied focus on what she does for others.  This week we get to take a look at what she makes for herself and what she wears.  I think we’ll find that even those things are done for others, too.She pays special attention to the place where her family sleeps and spends many hours a night.  She makes special coverings for them.  Now, as I’ve said, I’m not friends with the sewing machine.  Not a single bit.  But I can still do my part.  It’s our job as Mama’s to make sure our family has clean sheets and a comfy special sweet spot to retreat to when the day is over.  Making our bedrooms beautiful and relaxing should be a delight!

Her clothing is silk and purple is not actually referring to “silk,” but “white linen” of very fine texture, and very costly.  The purple garments were brought from the Phoenician cities, and were highly esteemed.  The purple color was actually obtained from a species of shell fish found in the Mediterranean sea.  The shell was broken in order to give access to a small gland which was removed and crushed.  The crushed gland gives a milky fluid that becomes red or purple on exposure to the air.

I found that ‘Lydia’ in the New Testament was a seller of “purple” (Acts 16:14).  Also, the Old Testament speaks tremendously about the colors that were used in the Tabernacle.  Purple and white (in the form of bleached linen) were among those colors; as well as crimson (blue), scarlet (red), and gold.We got a little glimpse into her fashion, which I found fascinating.  We know from past weeks that she is humble, sacrificing and puts herself last.  But yet, she doesn’t neglect herself either.  She knows that how she dresses reflects on her husband.  Her appearance could affect her husband’s character, leadership and opportunities he’s given.  She knows that, and isn’t willing to allow her appearance to reflect badly on him.  She dressed in a way so it couldn’t be said she was over dressed or under dressed.

It’s so super easy, when we’re so overwhelmed with the many tasks of motherhood {a lot of them dirty and smelly} to forget about our own appearance and the gift that caring for ourselves can be to our husbands.  How you dress, as a wife, will either show honor and respect to your husband or disrespect.  And she knows her husband doesn’t want to come home to a frumpy wife every day.  We have to remember to take care of ourselves as well.  It’s easy to get caught up in taking care of everyone else and neglecting ourselves.   So this week, shave your legs and put on some makeup!

 Likewise also that women should adorn themselves in respectable apparel, with modesty and self-control, not with braided hair and gold or pearls or costly attire, but with what is proper for women who profess godliness—with good works.
1 Timothy 2:9-10

Filed in: bible study, proverbs 31 • by Amy • 1 Comment

[jetpack-related-posts]

May 18, 2017

Words He Needs To Hear

Next month, we will celebrate 21 years of marriage.  I will have been officially married to him for over half my life.  And I’m still trying to figure out how respect = love to a man and how I get that really mixed up with food = love.  I can cook for him all the live long day but if I show him no respect then I am showing him no love.

But I do know as wives, we have incredible power in the lives of our husbands.  We have the power to build them up, or tear them down.

As wives, we love to feel loved and be romanced.  But for our husbands, they love to feel respected and to know we believe in them.  And I can assure you that feeling doesn’t come from a loaf of hot homemade bread and potato soup.  Believe me, I’ve tried.

God created men with a need to have respect from their wife.  Our men need to know that they are enough just as they are, and they are exactly what we desire.

Each time you give your husband a loving word of praise, you are valuing him.  He will feel treasured, adored, loved and he will thrive.  But something even more amazing happens – when you verbally appreciate your spouse with sincerity, his value goes up in your eyes, too.  You see him the way you are describing him and he becomes more and more valuable to you.  It is a win-win situation.  With more words of affirmation, love grows.  Um, hello smokin’ hot marriage!  When his woman is behind him, he will be able to take on the world.   Side-note:  I would bet when you shower him with praise, affirmation and kind words…you’ll get the same in return!

And ladies, I encourage you to praise him in front of your kids.  First of all, remember your kids are learning what marriage looks like by watching you.  They sure do need to see that their Mama appreciates and respects their Dad.  It means backing him up when he’s made a decision (even if you don’t agree), it means not making a decision without talking to him first and it means speaking good about him even when he isn’t around.  We need to teach our littles to appreciate how hard their Dads work to support and lead our households!

Each one of you also must love his wife as he loves himself, and the wife must respect her husband. 
Ephesians 5:33
Let’s help him take on the world today girls…♥ Thank you for loving me.

♥ I’m am so glad to have you as my husband.

♥ I trust you.

♥ I am such a different woman because of you.

♥ Thank you for being such a great husband.

♥ I’m sorry, will you forgive me?

♥ Thank you for leading our home!

♥ I’m glad you’re my best friend.

♥ Hey, the kids are in bed early. 😉

♥ You are such a great Dad.

♥ Sooooo glad you are MY man.

♥ Thank you for helping me today, I couldn’t have done it without you.

♥ I absolutely adore your heart.

♥ I love spending time with you.

♥ Thanks so much for doing that for me.

♥ I am more in love with you than ever.

♥ I love holding your hand.

♥ Our kids sure are blessed to have a Dad like you.

♥ You still take my breath away.

♥ You are exactly what I asked God for.

♥ I love you sooooo much!

Filed in: marriage • by Amy • Leave a Comment

[jetpack-related-posts]

May 16, 2017

Canning Chicken

This week our local hometown grocery store had their bi-annual meat sale.  This is my absolute favorite time to stock up!  With the amazing sale on chicken, I knew it was time to get canning.  Home canned chicken is so amazing.  Every bite is tender and so full of flavor, not to mention quick and easy to use.  I will never buy canned chicken from the store again!

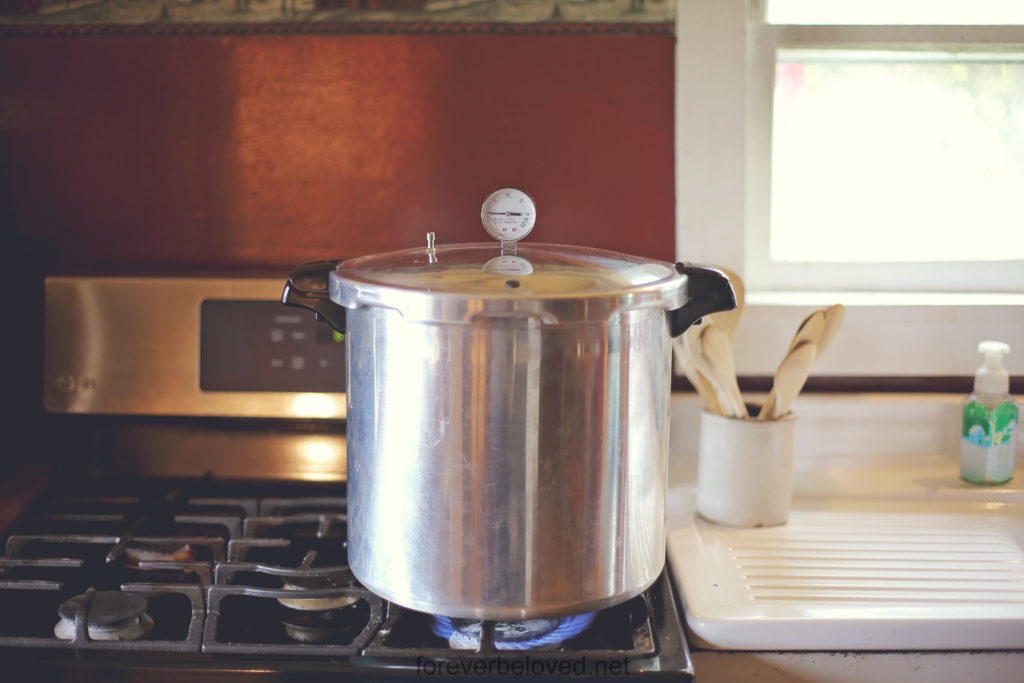
First, I use a Presto 23-Quart Pressure Canner and Cooker.  I love it, it’s easy to use and I’ve never had a single issue with it.  It comes with an in depth instrucion booklet full of recipes.  And the best part?  Amazon has them on sale right now!

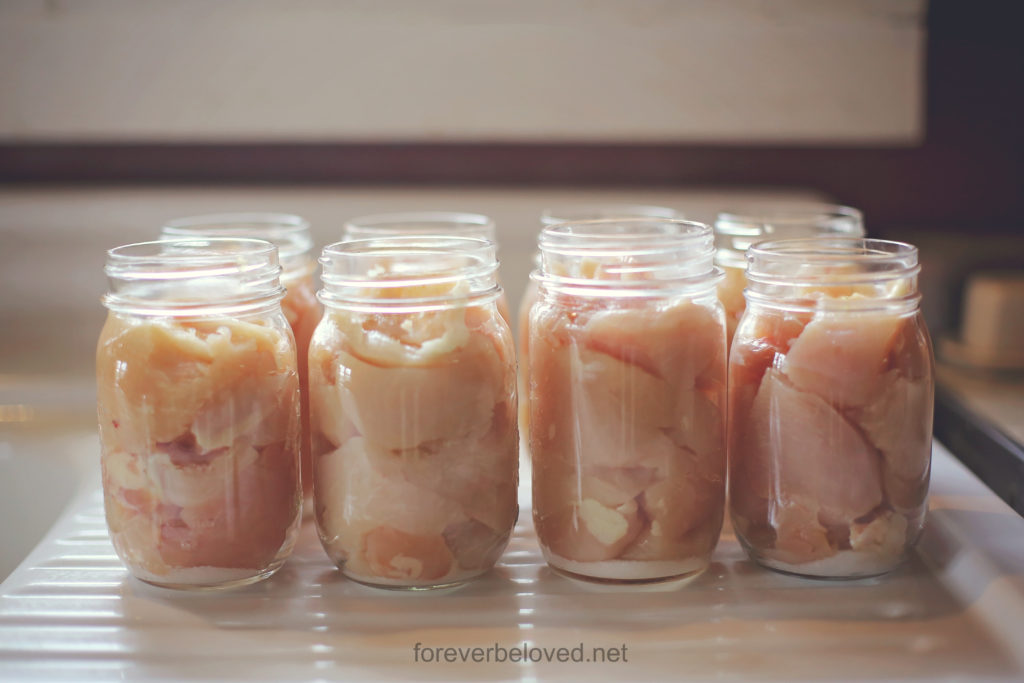
Start with clean, sterilized jars.  I run my jars through a cycle in the dishwasher to sterilize them.  Being that my chicken is cold when I pack it in, I don’t keep the jars hot.  I don’t want to take the chance of having broken jars in the canner.  We all know what happens when you mix hot and cold.

I used close to 10 lbs of chicken.  That much chicken will fill 9 pint jars and that is how many jars my canner holds.

I cut the chicken into chunks for the ease of getting it out of the jar.  As I’m cutting the chicken into chunks, I’m also cutting off any bits of grisle, bone or veins they have on them.  I save these little bits and put them in my freezer to use the next time I make homemade chicken broth.  The canned chicken will shred easily as you pull it out.  I do like to cut it into chunks so it is already an edible size when it comes out of the jar.  Then I don’t have to cut it later, just throw it into whatever I am cooking.

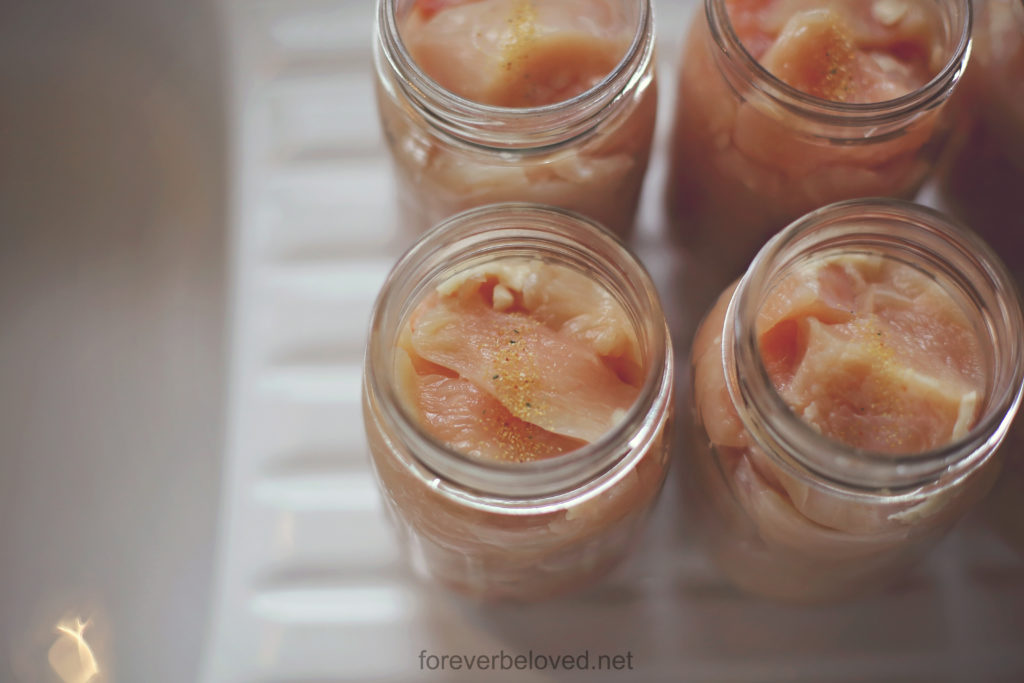
In the bottom of each jar, I put a 1/2 tsp of salt.  I then pack the chicken chunks in on top.  I fill the jars about half-way, then push it down and make sure all the nooks and crannies are filled in.  Then packing more chicken chunks in on top.

Make sure you have 1 1/4″ headspace between the chicken and the rim of your jar.  I have learned not to fill the jars exactly 1 1/4″ from the top.  I stop at maybe 1 1/2″ or so.  I noticed that some of the juices come out of the jar during processing.  If you under-pack the jar just a smidge it takes care of that problem.  In canning, headspace is the amount of space you leave between the rim of the jar and whatever you’re filling it with.  Each thing requires a different headspace.  I have a funnel that also has markings on the side to measure headspace.  Here is a little headspace chart to follow:

  • Leave 1-inch headspace for low-acid foods, vegetables and meats.
  • Leave 1/2-inch headspace for high-acid foods, fruits and tomatoes.
  • Leave 1/4-inch headspace for juicers, jams, jellies, pickles, and relishes.


You don’t need to add any liquid to the chicken.  When it cooks, it makes it’s own liquid.  Real, fresh, yummy chicken broth!

I topped off each jar with just a sprinkle of garlic powder, for extra flavor.

Wipe the rim of the jar off.  Never forget this step!  Even when you’re using a funnel, you are bound to get something on the rim.  And if the rim isn’t clean, it won’t seal properly.

Put your lids and rings on the jars.  Since we are doing a “cold pack” for the chicken, I don’t heat mine up before placing them on the jars.

Also since we are doing a “cold pack”, I didn’t prep my pressure canner ahead of time.  Being that my jars were still cold from putting cold chicken in them, I wanted to prevent my jars from breaking once the canning process started.  I put 3 quarts of hot tapwater in the pressure canner and sat my jars down in.  I gave them enough time to warm up a bit from the water before I even turned the burner on.  Make sure to read your directions for your specific canner to see how much water they advise.  Also, a little tip, to keep your jars from being “spotty” you’ll want to add 2 tablespoons of white vinegar to the water.

The first thing you need to do is vent your canner.  Venting means getting rid of the steam inside the canner so you can build up pressure.  To vent, you put your lid on and make sure it’s sealed  (follow the manufacturers instructions for this as well) and turn the heat up to medium or medium/high.  You DO NOT want your weight on yet.  When steam is steadily coming out of the vent, set your timer for 10 minutes.  Once the timer goes off, you’re ready for the next step.

Put your weight on the canner, being careful of the steam that’s coming out, and wait for it to come to pressure.  Once it’s up to pressure, set your timer for the appropriate time below.  Remember to only start the timer once your canner is up to pressure.  Waiting for the canner to get up to pressure sometimes takes several minutes, and it will feel like time stands still.  Just be patient, it will get there.

75 minutes at 15 lbs for pint jars (if you are under 1,000 ft. altitude, use 10 lbs)
90 minutes at 15 lbs for quart jars (if you are under 1,000 ft. altitude, use 10 lbs)

You may need to adjust the heat up or down during this time.  If you see your pressure rising above what it should be, reduce the heat.  If you see it falling below what it should be, raise your heat.  I normally don’t leave my kitchen while I’m pressure canning, just so I can keep a close watchful eye on the pressure.

When your timer goes off, turn the stove off.  Actually, turn the stove off and walk away.  Go take a much deserved seat for a while.  You HAVE to leave the lid on and allow the pressure canner to return to normal pressure.  I just let mine sit for quite a while.  Once the pressure is down to normal you can remove the lid and take your jars out.  I use the jar lifter to remove them.  And I always set them on a kitchen towel then cover them with another towel.  I don’t want them to cool down too quickly.

If you are new to pressure canning, I highly suggest purchasing a book on it.  There are some variables to consider, like altitude, and a book would be a great resource to get you familiar with pressure canning.

And nothing is quite as satisfying after a long, exhausting day of canning than seeing all those jars full of food you prepared with love for your family.  Give yourself a high-five!

The canned chicken is stored on the shelf in the pantry for up to 2-5 years.  No fridge or freezer needed.  You don’t have to heat it up to eat it either.  You can open it and eat it out of the jar if you wanted to, like tuna.  Perfect for a cold chicken salad, buffalo chicken dip, chicken and dumplings or throw it in a casserole.


Filed in: homesteading, recipes • by Amy • 3 Comments

[jetpack-related-posts]
  • « Previous Page
  • 1
  • …
  • 72
  • 73
  • 74
  • 75
  • 76
  • …
  • 897
  • Next Page »

Search

Categories

Blog Archive

Copyright © 2026 · Theme by Blog Pixie