• Meet Me
  • Sponsor
  • Testimony
  • Print Shoppe
  • Recipes

Forever Beloved

Faith, Love & Truth

April 12, 2018

My Five Favorite Canning Recipes

canning jars

When I was growing up I was blessed to not only have a Mama that grew her own food, but canned it as well.  Not only my Mama, but all the women in my family.  Many family gatherings would include a circle of women chatting about their recent crops and what they were planning on canning with them.  It was a given that once I had a household of my own, I would follow in all their footsteps.  And proudly, I have.

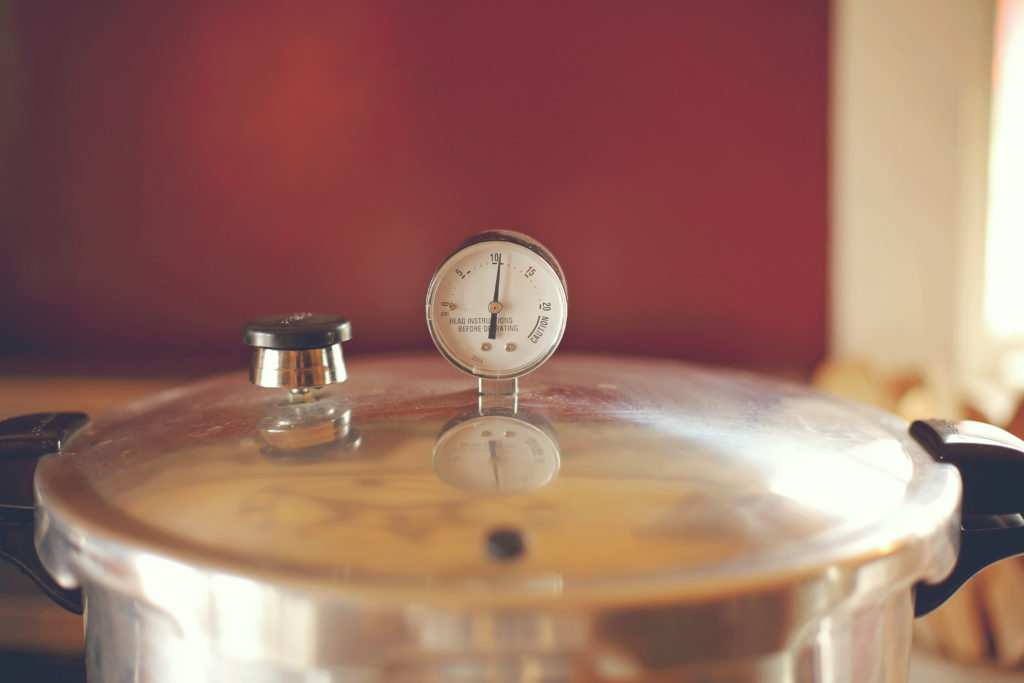
Once the end of summer draws near, I know it’s time to bring out the pressure canner and jars.  I couldn’t feel more in my element than I do in my kitchen with a pot of sauce simmering on the stove.

Throughout the years I’ve ventured a bit further than the basics my Mama canned, and I’ve found some new favorites of my own.  That is exactly what I want to share with you today, my top five favorite canning recipes!

Print Recipe
Hot Pepper Dip
This is an awesome dip that I can yearly. It is great on Ritz crackers spread with cream cheese. I also add a jar to my chili! It has just the right amount of kick.
Servings
pint
Ingredients
  • 7 green peppers
  • 7 hungarian wax peppers
  • 2 large onions
  • 2 garlic cloves
  • 24 ounces ketchup
  • 8 ounces tomato paste
  • 2 cups vinegar
  • 2 cups oil
  • 1 1/2 cups sugar
  • 1 tbs salt
Servings
pint
Ingredients
  • 7 green peppers
  • 7 hungarian wax peppers
  • 2 large onions
  • 2 garlic cloves
  • 24 ounces ketchup
  • 8 ounces tomato paste
  • 2 cups vinegar
  • 2 cups oil
  • 1 1/2 cups sugar
  • 1 tbs salt
Instructions
  1. Chop the peppers, onion and garlic; set aside. {I put mine through a grinder}
  2. Mix all ingredients except peppers and bring to a boil.
  3. Boil for 10 minute stirring occasionally. Be careful the bottom of the pan doesn’t scorch.
  4. Add peppers, bring to a boil again.
  5. To can, pour into jars. Place rings and lids on jars, making it fingertip-tight. Place on a cloth-covered or wood surface, several inches apart, until cool.
Share this Recipe
 
Print Recipe
Canned Peaches
Servings
Ingredients
  • 2 lbs peaches, per quart
  • 5 cups white sugar
  • 10 cups water
Servings
Ingredients
  • 2 lbs peaches, per quart
  • 5 cups white sugar
  • 10 cups water
Instructions
  1. To prepare peaches: Wash peaches; dip in boiling water for 30 seconds, then drop in ice water to loosen skins. Remove skins. Cut in half; remove pits and scrape away the red fibers around the pit, which can darken during storage. Set aside.
  2. Combine sugar and water in a saucepan and bring to a boil until sugar is dissolved. Keep syrup hot.
  3. Pack peach halves, cut-side down, into hot jars, leaving 1/2-inch headspace.
  4. Add hot syrup to within 1/2 inch of rim. Remove air bubbles with a nonmetallic spatula and add additional syrup, as needed.
  5. Wipe jar rims and threads. Place lids and bands on jars.
  6. Hot-Packing Method: Because the syrup is hot when you pour it in, I don’t put it through a water bath. Mine is always fine and has always sealed. You can always put yours in a water bath just to be sure.
  7. Water-Bath Method: Process in a boiling water bath for 25 minutes for pints, 30 minutes for quarts.
  8. Place on a cloth-covered or wood surface, several inches apart, until cool. Any leftover brine can be stored in the refrigerator till the next time you can.
Share this Recipe
Print Recipe
Sweet Pickled Beets
These are the absolute best pickled beets to make pickled eggs with!
Servings
Ingredients
  • fresh beets
  • 1 cup sugar
  • 1 cup vinegar
  • 1 cup water
Servings
Ingredients
  • fresh beets
  • 1 cup sugar
  • 1 cup vinegar
  • 1 cup water
Instructions
  1. Wash the beets, cleaning all the dirt off. Cut the leaves off the beet about 3” off the beet to prevent the beet from bleeding out.
  2. Separate into sizes so little ones don’t get over cooked and big ones are not under cooked. I like 3 kettles, they boil faster that way. Boil beets till tender, can be checked using a fork (like a potato).
  3. Drain and discard cooking liquid; let beets cool so they can be easily peeled. Hold the beet in your hand and squeeze it, it should pop right out of the skin. Cut beets into 1/2” pieces, leaving very small beets whole.
  4. Combine brine ingredients in a kettle. Bring brine to a boil and simmer for 10 minutes. Depending on the amount of beets you have, you may need to make more brine.
  5. Fill jars within 1/2” from the top with beets. Fill jar with boiling brine to 1/2” from top. Place rings and lids on jars, making it fingertip-tight.
  6. Hot-Packing Method: Because the brine is hot when you pour it in, I don’t put it through a water bath. Mine is always fine and has always sealed. You can always put yours in a water bath just to be sure.
  7. Water-Bath Method: Process in a boiling water bath for 30 minutes at up to 1000 feet in elevation.
  8. Place on a cloth-covered or wood surface, several inches apart, until cool. Any leftover brine can be stored in the refrigerator till the next time you can.
Share this Recipe
 
Print Recipe
Spaghetti Sauce
This spaghetti sauce recipe has been used in my family for generations.
Servings
quart
Ingredients
  • 1/2 bushell tomatoes
  • 2 bulbs garlic
  • 4 hot peppers
  • 3 lbs onions
  • 1/2 cup salt
  • 1 1/2 cups sugar
  • 3 tbsp italian seasoning
  • 8 cans tomato paste
  • 2 cups oil
Servings
quart
Ingredients
  • 1/2 bushell tomatoes
  • 2 bulbs garlic
  • 4 hot peppers
  • 3 lbs onions
  • 1/2 cup salt
  • 1 1/2 cups sugar
  • 3 tbsp italian seasoning
  • 8 cans tomato paste
  • 2 cups oil
Instructions
  1. Wash the tomatoes, hot peppers, garlic and onions.
  2. Cut the stem part off the tomatoes and quarter them. Leave the skin on them. Place them in a big bowl or plastic tub. I use my Grandma's enamel basin.
  3. Remove skin from onions and quarter the onion. Add them to the bowl with tomatoes.
  4. Cut the stems off of the hot peppers, cut them in half and remove the seeds. I let the seeds in two of the peppers to add some heat to my sauce. Add them to the bowl as well.
  5. Peel your garlic and set it aside.
  6. Little by little, add your vegetables in a blender and puree.
  7. Put pureed mixture through a food mill over top of your canning pot. The food mill will remove the skins and seeds.
  8. Turn your burner on high once tomatoes, onions and peppers are in your canner. Once it comes to a boil, reduce the heat to medium.
  9. Add the salt, sugar, italian seasoning, tomato paste and oil into your canner and mix well.
  10. Bring it to a boil and cook until thick. I cook mine for 4-5 hours, stirring occasionally.
  11. To can, pour into jars. Place rings and lids on jars, making it fingertip-tight. Place on a cloth-covered or wood surface, several inches apart, until cool.
Share this Recipe
Print Recipe
Zucchini Relish
This is a great way to use zucchini. It's a fabulous relish to eat on hotdogs and hamburgers!
Servings
pint
Ingredients
  • 12 cups shredded unpeeled zucchini
  • 2 shredded cucumbers
  • 4 cups chopped onion
  • 1 chopped green bell pepper
  • 5 tbsp canning salt
  • 6 cups white sugar
  • 2 1/2 cups white vinegar
  • 1 tbsp cornstarch
  • 3/4 tsp ground nutmeg
  • 3/4 tsp ground tumeric
  • 1 1/2 tsp celery seed
  • 1/2 tsp ground black pepper
Instructions
  1. I put my zucchini, cucumber, onion and pepper through a grinder. After ground, place the items in a large, non-metallic bowl, and sprinkle the salt over-top. Use your hands to evenly mix the salt throughout. Cover, and refrigerate overnight.
  2. The following day, drain and rinse well with cool water. Squeeze out excess water and set aside.
  3. Place the sugar, vinegar, and cornstarch into a large pot. Add the nutmeg, turmeric, celery seed and pepper. Stir to combine, then add the drained zucchini mixture.
  4. Bring to a boil over medium-high heat, then reduce the heat to medium-low, and simmer 30 minutes.
  5. Pack hot relish into sterilized jars, making sure there are no spaces or air pockets. Fill jars all the way to top. Place rings and lids on jars, making it fingertip-tight. Place on a cloth-covered or wood surface, several inches apart, until cool.
  6. Hot-Packing Method: Because the relish is hot when you pack it, I don’t put it through a water bath. Mine is always fine and has always sealed. You can always put yours in a water bath just to be sure.
  7. Water-Bath Method: Place a rack in the bottom of a large stockpot and fill halfway with boiling water. Carefully lower jars into pot using a holder. Leave a 2 inch space between jars. Pour in more boiling water if necessary, until tops of jars are covered by 2 inches of water. Bring water to a full boil, then cover and process for 30 minutes. Remove jars from pot and place on cloth-covered or wood surface, several inches apart, until cool.
Share this Recipe
 

Filed in: homesteading, recipes • by Amy • Leave a Comment

April 7, 2018

Canning Leftover Ham & Broth

Every Easter we eat dinner at my parents house.  One of our favorites is our Easter ham!  But this year, due to my Dads sodium restrictions, the entire leftover ham came home with me.  Not complaining y’all.  Ham is my jam (see what I did there).  I knew that we’d never eat the entire ham before is started to turn, so I decided to can the leftovers.  I have big plans of some ham pot pie this summer with it.

This is the time of year to stock up on ham. This week, pre-Easter prices are still available, you can get nice hams for as cheap as 87 cents per pound.  And who can pass up a good sale like that?

Canning ham is NOT difficult in any way and when done correctly, it is completely safe.  It absolutely requires you to use a pressure canner.  Read that again.  You must use a pressure canner.  If this is your first time using a pressure canner, you may want to check out my detailed instructions here.

The first thing we want to do is cut all the ham off the bone.  I cut mine into fairly larger chunks, so it didn’t fall apart during the canning process.  You can also freeze the bone for some ham and bean soup in your future.  Set your ham aside while you get everything else ready.

Once I had all the ham chunked up it was time to start filling the jars.  Fill your hot sterilized jars with the cut meat.  I packed it in really well, getting as much as I could in there while still leaving 1″ headroom.  If you aren’t sure how to keep your jars hot, you can always run them through a cycle in the dishwasher.  That’s normally what I do when I know I’m going to be canning that day.

Next you need to add liquid in with your ham.  You can either pour boiling water over the meat or, if you’re as lucky as I was, your Mama saved you all the ham broth!  I brought the broth to a boil on my stove and ladeled it over top of the ham, again leaving a 1 inch head space.  I had enough of that precious broth left to do a quart of it as well.  That broth will be a nice addition to my ham and beans that I make with that fabulous ham bone!

Make sure you wipe the rims of your jars before putting your hot lids and rings on them.  I wiped the jar rims with a cloth with a little vinegar to help remove any of the greasy residue.

Now it’s time to process!  Place the jars into the canner base making sure that there is space between them.  Make sure you remember to add your hot water in your canner.  Check your manual to see what your canner calls for, my canner requires 3 quarts of water.  Put your lid in place.  I highly suggest setting a timer so you know when the specified time is up.

Processing times are:

75 minutes  at 11 lbs for pint jars

90 minutes at 11 lbs for quart jars

Make sure to read your manual as additional pressure is needed for high altitude, over 2000 feet.

When your timer goes off, turn the stove off.  Actually, turn the stove off and walk away.  Go take a much deserved seat for a while.  You HAVE to leave the lid on and allow the pressure canner to return to normal pressure.  I just let mine sit for quite a while.  Once the pressure is down to normal you can remove the lid and take your jars out.  I use the jar lifter to remove them.  And I always set them on a kitchen towel then cover them with another towel.  I don’t want them to cool down too quickly.

Besides the benefit of stocking up on ham when it is very cheap, having canned ham and stock on the shelf is a HUGE convenience.  I can grab a can and have my ham pot pie halfway done, all I need to add is some potatoes and pot pie dough.  I’m thinking that will be a future blog post!

Now sit back, relax with a cool drink and listen for the sound of the PING of a successfully sealed jar!  A beautiful sound!


Filed in: homesteading, recipes • by Amy • 16 Comments

April 5, 2018

Preparing For Canning Season

Every year, as winter draws to a close, my heart starts dreaming of canning season.  I begin making mental notes of what I have enough of and what I need.  But if you’re new to the canning game, this process may seem overwhelming.  And believe me, it’s easy to get frazzled when it comes to canning.

Whether you prefer canning, freezing, fermenting or dehydrating we all have the same end goal in mind, to preserve food.  If you don’t have a game plan, the summer can easily pass you by and before you know it fall is here and you’re in a scramble to put food up.  Here are some canning tips to save time, money and energy.  And hopefully it makes your canning season a little better so you can get the most taste and quality out of your preserved goodness.

1. Set Goals

What are your goals for canning? You may want to save your family money or you may just enjoy the craft of it. You may have a garden and want to enjoy reaping the benefits of it all year long. You may enjoy canning because you have control over what goes into it (like no chemicals and preservatives).

You may have only one goal, or a few that I listed above. Think about your goals. Why do you want to do this and what do you want to get out of it?

I can for a few different reasons. I love that it saves our family money, it’s super yummy, it’s convenient and honestly I just really love canning. I love knowing that I can run downstairs and grab a jar of spaghetti sauce or chicken broth.

2.  Check Your Inventory

–Check dates:  It’s very important to mark dates on each jar you preserve for this reason, oldest food needs used first.

–Spoilage:  Do a visual check of seals and quality.  If something is unsealed, discard it straight away.  The food inside may still look normal and fine, but if it’s unsealed it needs discarded.  Also check for discoloration even on sealed jars, that could mean it has spoiled.

3.  Understand Canning Styles {there are two}

-Hot water bath canning: submerge canned foods in hot water and boil the jars for a certain length of time

-Pressure cooker canning: enclose canned foods in a pressure cooker and process them for a certain length of time. The temperature inside a pressure cooker is higher than is possible in a pot of boiling water.  I’ve written an in-depth guide to pressure canning here.

4.  Check Your Jars

Save the heartache of unsealed lids or money wasting broken jars (and ruined food) in the canner by doing a careful inspection first before putting any food inside.  Check your jars carefully for cracks, chips and defects.  Here is a great in-depth post of how to properly inspect your jars.

Take inventory of your empty canning jars so you have an idea of how many you have on hand.  Watch the local sale flyers, normally around canning season stores will have sales.  The jars will need washed before use.  I fill my dishwasher up and start the cycle when I start my canning.  Not only are the jars clean, but they’re normally still warm when I’m ready for them.

  • Tip: Hold on to the original boxes for storage.  Let me say that again, hold on to the original boxes.  When this girl started canning, she threw those boxes away.  Big mistake!  I store my canned food in the basement, and those boxes make life so much easier when you’re carrying precious jars of amazingness down flights of stairs. 

5. Check Your Equipment

Even if you are a seasoned canner, you normally find that first canning session awkward.  Finding your rhythm takes a bit.  Preparing ahead of time can make the process so much easier.  An important step is taking the time to evaluate your canning equipment.

-Canning Tools: Gather together all your canning utensils before beginning.

  • spoons – I prefer wooden
  • jar rack – a rack that fits inside your canner to hold jars
  • magnetic lid lifter – a tool for picking up and placing just one lid at a time
  • canning funnel – to get liquids into the jars without spilling all over
  • jar lifter – essential for getting hot jars out of hot water safely
  • food mill – used for mashing and sieving

-Canners: If you’re planning on canning anything that requires the water bath method, you’ll need a pot tall enough to accommodate your jars. Make sure your pot has enough room for a couple inches of boiling water and a couple inches of head room above that is fine for boiling water bath canning. Your pot will also need to have a canning rack in it.

Some of the items you’re planning to can may require pressure canning {green beans is one example}.  Wash and rinse your canner to start with.  Check the sealing rings and over-pressure plug. Replace if needed. These should be replaced every two to three years. Review your canner’s manual to refresh your memory of the canning procedure.

-Lids and Rings: Check over all your rings and discard the ones that are distorted, dented, or rusty as they could cause your jars not to seal properly.  If you’re like me, you always have way more rings than you’ll ever use. I’m not quite sure how that happens honestly. If you are buying new jars, a lot of times they will come with lids and rings.  Purchase plenty of new lids early in the season. You don’t want to run out when elbow deep in sauce.

  • Tip:  Purchase a medium size plastic tote to store all your canning items in.  It not only makes storage easier, but it keeps them from getting separated and lost.  
  • Tip:  To store your extra rings, buy a spool of twine and cut a piece around 3-4 ft. in length (depending on how many rings you have to store).  Tie the end of your twine to one ring and then thread the twine through all the rings.  The ring tied onto the twine at the bottom will hold all the other rings on there.  Tie a loop on the other end of the twine.  Now you can hang all your extra rings up!  I got this tip from my Mama.   

6. Choose Your Recipes

You’ll need to sort out your recipes and decide what you’re canning.  So before you begin, search out recipes in your favorite cookbook or look on Pinterest.  Here is a link to my Pinterest board all about canning.  There are so many amazing canning recipes there!  Also be watching my blog for an upcoming post, my top 5 favorite canning recipes!

7. Buy Your Basics

Pull out all those recipes, read over them and make sure you have the ingredients on hand.  Trust me, this is important.  You don’t want to get your spaghetti sauce nearly done and realize you’re out of tomato paste.  Been there, done that.

There are some items that I already know I will use a ton of throughout canning season.  Tomato paste, vinegar, salt, sugar and ketchup are my must-haves for canning season.  Your basics might also include pectin and bottled lemon juice.  If you know what items you’ll need a lot of, it may be better to buy them in bulk at Sams or Costco.

Check through your spices, too, and make sure you’re good for italian seasonings, cinnamon, pickling spice, or whatever spices you know will be used.  I highly recommend buying your spices in bulk.  Fresh spices mean tastier preserves!

8. Break Up The Process

Who says it all has to be done in one day?  I mean, I obviously wouldn’t put my tomatoes through the food mill and leave them wait…but there are some things that can be divided.  This tip has saved me so much stress over the years: break up canning tasks when ever possible.  Some examples:

  • Pick & wash green beans today, snap them tomorrow, can them the day after that.
  • Grind zucchini, cucumbers, onions and peppers for relish today and put in the fridge tonight.  Can tomorrow.
  • Chop the onions, garlic, and peppers for your recipe a few days ahead of time and store in the fridge.
  • Husk corn and store in the fridge, cut it off the cob and process the next day.

9. Slow Cook Sauces

When making ketchup, barbeque sauce, fruit butters, bacon jam, etc.  Puree the ingredients and put it into your slow cooker.  Prop the lid open with chopsticks or dull kitchen knives so the steam can escape.  Put it on low and let it do it’s thing.  Let it cook for as long as necessary to get a thick sauce, stirring every now and then.  This is much easier than standing over a hot stove cooking and stirring, or taking the chance of it scorching on the stovetop.

10. Invite Your Girls Over

An important part of this process is not overwhelming yourself.  And if this is your first time canning, trust me, you’ll want all the help you can get.  Especially if it’s someone who has canned prior.  Plus it’s just more fun to do this kind of work with another person.  Chatting and laughing make the day go faster!

And there you have it. You’re all ready for a fun-filled day of canning.  And listening for that ping ping coming from your kitchen later in the day.

Filed in: homesteading • by Amy • Leave a Comment

  • « Previous Page
  • 1
  • 2
  • 3
  • 4
  • 5
  • 6
  • Next Page »

profile

profile

Wife & Mama • Iced coffee seeker & curator of chaos • Collector of words & magic • Obsessed with laughter & bright lipstick • Dreaming & homesteading in the hills of PA

  • Bloglovin
  • Email
  • Facebook
  • Instagram
  • Pinterest
  • Twitter

Search

Categories

Blog Archive

Subscribe to the Blog

Enter your email address to subscribe to this blog and receive notifications of new posts by email.

Join 32 other subscribers

Find Me Here

image iconimage icon

Copyright © 2025 · Theme by Blog Pixie


Loading Comments...